Building Kivy apps for Android
This entire page is deprecated. Please visit Kivy-Reloader for an updated version
Kivy Reloader Link
Time 🕐
Estimated time of completion: 1 hour to 2 hours for setup. 30 min to 6 hours (for first compile).
Requirements
Before building your Kivy app to Android, we expect you to have already followed our installation guide to your operating system.
At this point, you should have Python installed on your computer (installed with Pyenv), and you should be able to run Kivy apps on your computer using Pyenv and poetry. This is the only requirement for this tutorial.
Building your APK
Please, choose your operating system and follow the instructions below:
Step 1: Install WSL (Windows for Linux Subsystems) and Ubuntu
What is WSL?
What is WSL? WSL is Windows for Linux subsystems. You will use WSL to install Poetry, and also compile Kivy apps for Android. It adds a Linux system (also called distro) like Ubuntu to your Windows machine so you can use Linux commands on your folders while staying in a Windows environment. You will use WSL and your Linux system to buildozer -v android debug when compiling a Kivy application for Android.
How do I install WSL?
- Reference Installation Link
- Open powershell as administrator (⊞ Windows key > type "powershell" without quotes)
- In your administrator powershell, type
£C:\Users\KivySchool\ wsl --install
- Reboot your pc
Common Errors
If you get error 0x80370102, you can try to set your WSL version to 1 using:
wsl --set-default-version 1.
Installing Ubuntu
- After installing WSL, now you must choose your distro. The linux distro for this tutorial is Ubuntu.
- Reference Link
- In Powershell, type
£C:\Users\KivySchool\ wsl --install -d Ubuntu-22.04
- To see the list of distros, type
wsl --list --online - For this tutorial, install Ubuntu (If you cannot install Ubuntu-22.04, try using
wsl --install -d Ubuntu)
- You can also install Ubuntu through the Microsoft Store.
- Go to the Microsoft Store (⊞ Windows key > type "Microsoft Store")
Find Ubuntu 22.04.2 (Any recent version is fine)
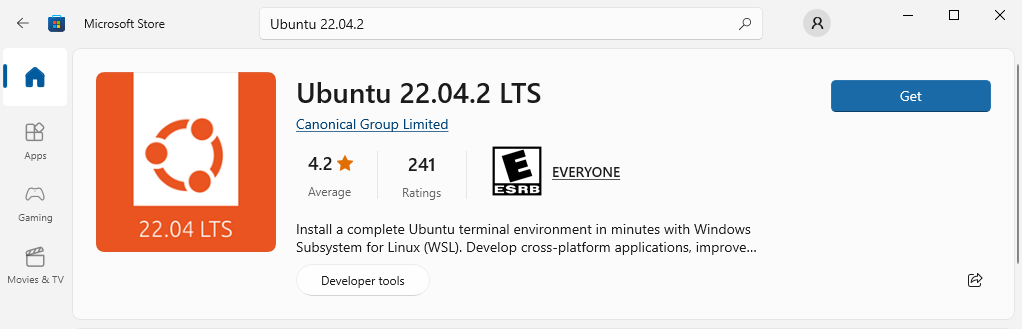
- Click Install/Get
- Run the installer
- Check if Ubuntu is installed: (⊞ Windows key > type
Ubuntu> press "Enter")
What happens if I don't install Ubuntu?
In that case, WSL will error because no Linux distro is installed. You also cannot compile Kivy for Android and can only make PC Kivy apps.
    C:\Users\vboxuser>wsl
    Windows Subsystem for Linux has no installed distributions.
    Distributions can be installed by visiting the Microsoft Store:
    https://aka.ms/wslstore
How to open Ubuntu from Windows?
You can directly open your Linux distribution by visiting the Windows Start menu and typing the name of your installed distributions. For example: Ubuntu. This will open Ubuntu in its own console window. Reference Link
Check if Ubuntu is installed
- Hit ⊞ Windows key and type:
Ubuntu, then you should see an Ubuntu terminal show up.
Step 2: Creating your environment on WSL
Returning to this tutorial
You must source ~/.bashrc to get your terminal with all the variables back. Then poetry shell in your project folder if you've reached that step. Then you can continue with this tutorial.
$ source ~/.bashrc
$ poetry shell
First, update WSL:
$ sudo apt-get update
Install git
$ sudo apt-get install git
Installing pyenv on WSL
-
Install dependencies:
$ sudo apt-get install git gcc make openssl libssl-dev libbz2-dev libreadline-dev libsqlite3-dev zlib1g-dev libncursesw5-dev libgdbm-dev libc6-dev zlib1g-dev tk-dev libssl-dev openssl libffi-dev
If you want to set any variable persistently, you need to add it to one of the shell's configuration files yourself. https://askubuntu.com/questions/1024732/when-i-do-an-export-path-using-terminal-which-file-does-it-save-to
read up on this (which 1 file to mod and source?) https://www.baeldung.com/linux/bashrc-vs-bash-profile-vs-profile
- Install pyenv
$ curl https://pyenv.run | bash
-
Update and source config
-
Here we will modify
~/.bashrcwith the built innanoeditor in Ubuntu. This way when yousouce ~/.bashrcyou will get all your environment variables back when you return to this tutorial or want to make another project. -
Go to your home folder cd ~ https://askubuntu.com/questions/644040/how-to-access-ubuntu-and-folder
- nano .bashrc
- go to the very end
- add these lines export PATH="/home/USERNAME/.pyenv/bin:\(PATH" eval "\)(pyenv init -)" eval "$(pyenv virtualenv-init -)"
-
X, Y, ENTER
-
refresh your terminal: source ~/.bashrc
-
now pyenv is installed on your computer!
install python
- time to set your python installation using pyenv: pyenv install 3.10.7 (if not, check with pyenv -l -o iirc) pyenv global 3.10.7
install poetry
reference link https://python-poetry.org/docs/
- Press ⊞ Windows key > then type
WSL. - A WSL terminal should open.
- In WSL, type:
curl -sSL https://install.python-poetry.org | python3 - - If that does not work, try
pythoninstead ofpython3. You just need to reference python in the same way your PATH references pythoncurl -sSL https://install.python-poetry.org | python -
check how ur wsl references python, check: python and python3
then if it's python, install poetry with curl -sSL https://install.python-poetry.org | python -, else python3 is curl -sSL https://install.python-poetry.org | python3 -
$ curl -sSL https://install.python-poetry.org | python3 -
since wsl and windows share the same path, if u have already installed poetry then wsl will try to use windows poetry instead of poetry for ubuntu. then do this solution: https://stackoverflow.com/a/71516572 add to bashrc export PATH="\(HOME/.local/bin:\)PATH"
buildozer preparation
reference link: https://buildozer.readthedocs.io/en/latest/installation.html
- Install these libraries so that buildozer will work properly:
sudo apt install -y git zip unzip openjdk-17-jdk python3-pip autoconf libtool pkg-config zlib1g-dev libncurses5-dev libncursesw5-dev libtinfo5 cmake libffi-dev libssl-dev
for WSL 1
u need to use java 11, else buildozer will not build - [ ] this guy has it, clang is fucked on wsl 1: - [ ] https://github.com/kivy/buildozer/issues/1543#issuecomment-1382574110
not sure about these:
sudo apt update; sudo apt install build-essential libssl-dev zlib1g-dev \ libbz2-dev libreadline-dev libsqlite3-dev curl \ libncursesw5-dev xz-utils tk-dev libxml2-dev libxmlsec1-dev libffi-dev liblzma-dev then it was missing all of them wtf
sudo apt update; sudo apt install build-essential libssl-dev zlib1g-dev libreadline-dev libsqlite3-dev
Step 8: Simple "Kivy Hello World!" for Android
You can also compile a Kivy "Hello World!" app for Android.
Hello world! Kivy app compiled for android with screenshare to PC
Prequisites for this tutorial
You should have pyenv, poetry, git, vs code (or another editor of your choice) installed and have completed step 7 for context. To check if they're installed, type in a terminal and get a response:
- python
- poetry
- git
- pyenv
VS Code is not required, but recommended as the tutorial uses VS Code as an example editor.
If they are not Installed, see above for instructions.
- Make a new folder and name it
KivyAndroidProject - Open the
KivyAndroidProjectfolder with VS Code (File>Open or useCTRL+ Kfollowed byCTRL + O) - In VS Code, use the default shortcut to bring up a new terminal
CTRL + J - Make sure your VS Code terminal is in the right folder (your
KivyAndroidProjectfolder). You can do this by typing in your terminal:cd "Location of your KivyAndroidProject folder" - In your terminal, make sure you're in the project folder and type:
poetry init - Follow the prompts. You can press Enter on all of them since the defaults are fine for this project. You can add Kivy in generation or by using the next step.
- You can choose to add Kivy in poetry generation, but if you forgot you can type:
poetry add kivy - Add buildozer as a dependency.
poetry add buildozer
What is buildozer?
Buildozer is a toolchain that lets you compile kivy apps for android. After you follow this tutorial, you will see that this process is very smooth after the first install/compile process and lets you prototype and create Kivy apps for Android with lightning speed.
- After adding Kivy and Buildozer, install it to your virtual environment:
poetry install - Enter your virtual environment
poetry shell
virtual shell already activated!
https://stackoverflow.com/questions/60580332/poetry-virtual-environment-already-activated do this command: source $(poetry env info --path)/bin/activate
What is a virtual environment?
A virtual environment is used to separate your work on a project from your base operating system. This is so that different python versions don't conflict, and make it harder for version conflicts to happen. The worst case scenario is that you install everything in your base Windows system. This is a problem because one project might need a dependency like OpenCV and python 3.7 to work, but in another project a dependency wants python 3.10. You will get a lot of headaches trying to sort out versions. Instead, separate them in virtual environments away from your operating system to save yourself the trouble.
With Poetry, you type poetry shell in your project's folder so that you interact with python and the dependencies listed for that project only, NOT the version of python that is installed in your base OS.
- Create your simple Kivy app by adding this in
main.py:from kivy.app import runTouchApp from kivy.lang import Builder kvString = ''' Button: text: "Hello World!" ''' runTouchApp(Builder.load_string(kvString)) - Now to verify that it works on windows, press F5 on VSCode while main.py is selected. You can also run
python main.pyin your poetry shell terminal. Make sure yous saved main.py before running. - To compile an app for android, make sure WSL is installed:
- In your terminal, type:
wsl --list --verbose - You should get a list of systems which should include Ubuntu, else reference installation instructions above.
- Go to Ubuntu that you installed with WSL.
How to open Ubuntu from Windows?
Note
You can directly open your Linux distribution by visiting the Windows Start menu and typing the name of your installed distributions. For example: "Ubuntu". This will open Ubuntu in it's own console window. Reference Link
- In Ubuntu, update and install the necessary requirements for buildozer
sudo apt update; sudo apt install build-essential libssl-dev zlib1g-dev \ libbz2-dev libreadline-dev libsqlite3-dev curl \ libncursesw5-dev xz-utils tk-dev libxml2-dev libxmlsec1-dev libffi-dev liblzma-dev -
Also install git:
sudo apt-get install git -
Install pyenv in ubuntu: (this means you have pyenv on Windows and on Ubuntu)
git clone https://github.com/pyenv/pyenv.git ~/.pyenv
cd ~/.pyenv && src/configure && make -C src
WTFFFFFF
USE THESE INSTRUCTIONS: https://www.techtronic.us/install-python-pyenv-on-wsl-ubuntu/
GET OUF OF PYENV FOLDER BTW (add && cd ..) ITS USING THE PYENV ON WINDOWS WTF, change the source shit
REMEMBER to pyenv install on wsl as well before installing poetry then pyenv global 3.10.9 Missing the lzma lib? https://stackoverflow.com/questions/57743230/userwarning-could-not-import-the-lzma-module-your-installed-python-is-incomple sudo apt-get install liblzma-dev WRONG INSTRUCTIONS FOR INSTALLING POETRY export poetry path then check if source the 3 guys has it
export PATH="/home/pengin/.local/bin:$PATH"
remember virtualenvs inproject true
even make a new project for wsl
Java compiler (javac) not found, please install it.
javac -version sudo apt install openjdk-19-jdk-headless sudo apt-get install unzip
sdkmanager path "/home/pengin/.buildozer/android/platform/android-sdk/tools/bin/sdkmanager" does not exist, sdkmanager is notinstalled
sdkmanager path "/home/pengin/.buildozer/android/platform/android-sdk/tools/bin/sdkmanager" does not exist, sdkmanager is notinstalled
I had the same problem, so I just removed android-sdk folder in home
https://github.com/kivy/buildozer/issues/927#issuecomment-1102128804
https://stackoverflow.com/questions/53994924/sdkmanager-command-not-found-after-installing-android-sdk
https://stackoverflow.com/a/72443530
WTFFFF
- Add to .bashrc
echo 'export PYENV_ROOT="$HOME/.pyenv"' >> ~/.bashrc echo 'command -v pyenv >/dev/null || export PATH="$PYENV_ROOT/bin:$PATH"' >> ~/.bashrc echo 'eval "$(pyenv init -)"' >> ~/.bashrc - Add to .profile
echo 'export PYENV_ROOT="$HOME/.pyenv"' >> ~/.profile echo 'command -v pyenv >/dev/null || export PATH="$PYENV_ROOT/bin:$PATH"' >> ~/.profile echo 'eval "$(pyenv init -)"' >> ~/.profile - Add to .bash_profile
echo 'export PYENV_ROOT="$HOME/.pyenv"' >> ~/.bash_profile echo 'command -v pyenv >/dev/null || export PATH="$PYENV_ROOT/bin:$PATH"' >> ~/.bash_profile echo 'eval "$(pyenv init -)"' >> ~/.bash_profile - Finalize changes:
source .bashrc && source .profile && source .bash_profile - Pyenv should be installed. To check if pyenv is installed in Ubuntu, type in your Ubuntu terminal:
pyenv --version - Go to your project file in Ubuntu. You do this by the
cdcommand. To get to your regular drives in Windows, append '/mnt/' to yourcdcommand, ex:cd /mnt/f/2023/KivyAndroidProject. This gets you to Drive F, folder 2023, folder KivyAndroidProject. Remember to use forward slashes in Ubuntu and lower case drive letters:/mnt/c/ - In your project folder in Ubuntu, type:
poetry installpoetry shellin the spec file, agree to the licenses as per:buildozer init - Build failed: Requested API target 31 is not available, install it with the SDK android tool.
- https://stackoverflow.com/questions/62328615/kivy-to-android-apk-using-buildozer-on-ubuntu-not-work
- You will be prompted to agree to licences a few times. You need to type 'y' not just hit space or enter.
-
(or u can agree in the spec file)
-
develop?
-
https://stackoverflow.com/a/73051969
-
set androidapi high, try 31
- https://github.com/shashi278/social-auth-kivy/issues/8#issuecomment-753653159
buildozer -v android debug
Common Errors
-
- "Sdkmanager is not installed"
- No such file or directory: 'unzip'"
- "autoreconf: not found" sudo apt-get install autoconf https://www.cyberithub.com/solved-autoreconf-automake-failed-with-exit-status-1/
- checking whether the C compiler works... no means ur android ndk did not install correctly. download properly with wget then unzip
- sh.CommandNotFound: zip
- sudo apt-get install zip
-
BUILD FAILED: gradlew failed! https://github.com/kivy/buildozer/issues/854#issuecomment-776716028 Delete the .gradle folder in your home directory. Once u do this run the command again, then the buildozer will download the Gradle once again and the app will be built without any problems.
Try to run this command: sudo rm -rf ~/.gradleif that does not work, you can manually download gradle:
- gradlew failed:
- https://stackoverflow.com/questions/48034063/build-apk-using-buildozer-and-kivy-error-with-gradlew-new-project
- This error mostly occurs when you've interrupted the system when Gradle was downloading.
- [ ]
- You can simply fix this by manually downloading gradle from https://services.gradle.org/distributions/gradle-4.4-all.zip
- [ ]
- Then replace the gradle-4.4-all.zip.part in /your/home/path/.gradle/wrapper/dists/gradle-4.4-all/4th6d42q1kgladv9hkn2iehgi5 with the new dowloaded file
Make sure your dependencies installed correctly, else you will get errors like:
- install java 17 instead: (ONLY FOR WSL 2, ELSE DO JAVA 11 AS PER: https://github.com/kivy/buildozer/issues/1504)
-
Unsupported class file major version 62
-
[DEBUG]: General error during semantic analysis: Unsupported class file major version 62
- Version 62 Is Java 18. Error is probably due to an added jar built with Java 18. This is not going to work.
- The Java version used by p4a is the version required for the gradle version used. This can be any version between openJDK-11 and 17, the install instructions suggest 17.
-
https://github.com/Android-for-Python/Android-for-Python-Users#unsupported-class-file-major-version-62
-
apt-cache search java17 (search online for java 17)
- sudo apt-get install openjdk-17-jdk-headless
- sudo apt-get remove
- [ ]
- apt list jdk --installed
this means u must redownload sdk/ndk it really is cannot allocate memory: Caused by: java.lang.RuntimeException: java.nio.file.FileSystemException: /home/pengin/androidproject/androidproject/.buildozer/android/platform/build-arm64-v8a_armeabi-v7a/dists/myapp/libs/arm64-v8a/libSDL2_ttf.so -> /home/pengin/androidproject/androidproject/.buildozer/android/platform/build-arm64-v8a_armeabi-v7a/dists/myapp/build/intermediates/merged_jni_libs/debug/out/arm64-v8a/libSDL2_ttf.so: Cannot allocate memory
If you suspect your dependencies did not install properly, rerun this command:
sudo apt install -y git zip unzip openjdk-17-jdk python3-pip autoconf libtool pkg-config zlib1g-dev libncurses5-dev libncursesw5-dev libtinfo5 cmake libffi-dev libssl-dev
cmd (not sure anymore)
sudo apt update; sudo apt install build-essential libssl-dev zlib1g-dev \ libbz2-dev libreadline-dev libsqlite3-dev curl \ libncursesw5-dev xz-utils tk-dev libxml2-dev libxmlsec1-dev libffi-dev liblzma-dev
There are 2 phases of compiling with buildozer. Phase 1 is downloading android sdk and ndk. If those downloads fail you MUST cd to the folder and use wget to download completely then unzip them.
Phase 2 is downloading python packages like numpy. For phase 2, if downloads fail you can just retry the buildozer -v android debug command
??? note "how to use wget to force a proper android sdk/ndk download":
- wget then unzip:
- https://stackoverflow.com/a/61501412
- # Android SDK is missing, downloading
- # Downloading https://dl.google.com/android/repository/commandlinetools-linux-6514223_latest.zip
- # Android SDK found at /home/pengin/.buildozer/android/platform/android-sdk
- Then you unzip it with the command: $ unzip sdk-tools-linux-3859397.zip
- NDK
- # Android NDK is missing, downloading
- # Downloading https://dl.google.com/android/repository/android-ndk-r25b-linux.zip
- # Unpacking Android NDK
- # Run ['unzip', '-q', '/home/ubuntuuser/.buildozer/android/platform/android-ndk-r25b-linux.zip']
- # Cwd /home/ubuntuuser/.buildozer/android/platform
- # Run ['unzip', '-q', '/home/pengin/.buildozer/android/platform/android-ndk-r25b-linux.zip']
- # Cwd /home/pengin/.buildozer/android/platform
- instructions: download the sdk and/or ndk then do these commands:
- go to the right spot (buildozer says)
- do:
wget the right zip link - then unzip that zip link
- go back and redo build buildozer -v android debug log ????
- The first compile will take a long time (as long as 4+ hours), however the next compilations will only take a few minutes.
- While your app's apk is compiling, make sure you have adb (android debug bridge) and scrcpy (screencopy) installed.
- To check if adb is installed, type in your Windows terminal:
adb - No response means you use Chocolatey to install adb and scrcpy.
What is chocolatey?
Chocolatey is a package manager for windows that handles installs. You will use it to install adb (if necessary) and scrcpy. Reference Link
- Use an admin cmd terminal.
How to run cmd with admin priviledges?
- Hit ⊞ Windows key and type "cmd"
- Then either right click on the command prompt icon and click on "run as administrator" or the "run as administrator" button on the right side of the start screen
- In your admin cmd:
@"%SystemRoot%\System32\WindowsPowerShell\v1.0\powershell.exe" -NoProfile -InputFormat None -ExecutionPolicy Bypass -Command "[System.Net.ServicePointManager]::SecurityProtocol = 3072; iex ((New-Object System.Net.WebClient).DownloadString('https://community.chocolatey.org/install.ps1'))" && SET "PATH=%PATH%;%ALLUSERSPROFILE%\chocolatey\bin" - Check if chocolatey is installed in a new admin terminal (so that command prompt refreshes variables and finds chocolatey):
choco -? - Upgrade chocolatey:
choco upgrade chocolatey - Now install adb with chocolatey using an admin terminal:
choco install adb choco upgrade adb - Now install scrcpy with chocolatey using an admin terminal:
choco install scrcpy
choco upgrade scrcpy
Test it out!
- Connect your android phone to the computer with a USB cable.
- In a new terminal, type:
scrcpy - Make sure you "allow USB debugging" on your phone, and that it is unlocked.
- Now your phone will be mirrored to the PC for easy testing.
- After app is compiled:
- In Ubuntu, type:
export ADB_SERVER_SOCKET=tcp:192.168.15.174:5037 - Run
buildozer -v android debugagain in your project folder to recompile . - This compile should only take a few minutes.
- Find this your platform-tools folder, it is in
\AppData\Local\Android\Sdk\platform-tools - make a terminal and run this command
.\adb -a -P 5037 nodaemon server - In Ubuntu in your project folder, run:
(just to deploy)
buildozer android deploy run logcat
(this also builds)
(not it) buildozer -v android debug deploy debug run logcat
- phone has to be in "attach" or "debug" mode or smth like if u can access the files it won't accept apps
- Make sure your device is not connected as a media device
- https://stackoverflow.com/questions/21170392/my-android-device-does-not-appear-in-the-list-of-adb-devices
- https://www.reddit.com/r/kivy/comments/sg0y2v/waiting_for_application_to_start_loops_in_terminal/
- https://github.com/kivy/kivy/wiki/Using-Buildozer-on-windows-10-using-WSL
- [ ]
- get phone ip
- adb shell ip -f inet addr show wlan0
- [ ]
- waiting for application to start:
- # Run ['/home/ubuntuuser/.buildozer/android/platform/android-sdk/platform-tools/adb', 'devices']
- in ubuntu
- export ADB_SERVER_SOCKET=tcp:192.168.15.174:5037
- ur ip
- 192.168.1.73
stuck on #waiting for application to start means that it built right, but adb cannot communicate with your phone. then try this: - [ ] https://stackoverflow.com/a/67097784 - [ ] adb unauthorized wsl2 - [ ] adb version on wsl and windows have to match - [ ] so the spam -> setup adb as per this comment - [ ] https://stackoverflow.com/a/67097784 - [ ] - [ ] https://stackoverflow.com/questions/60166965/adb-device-list-empty-using-wsl2 - [ ] - [ ] https://stackoverflow.com/questions/18930050/adb-connection-over-tcp-not-working-now - [ ] - [ ] https://stackoverflow.com/questions/4506874/cannot-run-adb-from-terminal-in-ubuntu - [ ] That means adb is not in the PATH. - [ ] If adb is in the current directory, try ./adb instead.
Hello world!- If you're using git to upload to github, now is the time to add
.venvto the.gitignorefile. You'll thank yourself later.
if ur building, try buildozer appclean then try again
- build problems = reset
- delete .buildozer in ~
-
buildozer appclean (delete .buildozer in app folder)
-
https://stackoverflow.com/questions/56224956/execution-failed-for-task-processdebugresources-buildozer-kivy
-
You don't need to always do a buildozer appclean if you don't change buildozer.spec.
-
another resource:
- https://github.com/kivy/kivy/wiki/Using-Buildozer-on-windows-10-using-WSL