How to install Kivy
Time 🕐
Estimated time of completion: 30min to 1h (depending on your experience and your operating system)
Requirements
Before installing Kivy, you need to install some tools and libraries:
- Git
- Pyenv
- Poetry
We strongly recommend you to follow this guide to install the required tools and libraries. If you ever need help, go to any support channel in the Official Kivy Discord.
Installation Guide
Please, choose your operating system and follow the instructions below:
This is the macOS installation guide. If you are using another operating system, please, select it from the menu above.
How to open the terminal on macOS
You can open the terminal on macOS by pressing ⌘ + Space and typing terminal in the search bar.
Tip 💡
If you are using macOS, we recommend you to use Homebrew to install the required tools and libraries. Enter the website and follow the instructions to install Homebrew. This will make your life easier.
Step 1: Check if you have Homebrew installed
What is Homebrew?
Homebrew is a free and open-source software package management system that simplifies the installation of software on Apple's operating system, macOS, as well as Linux.
from Wikipedia
How to check if you have Homebrew installed
- Press ⌘ + Spacebar, type terminal and press enter
- Type
brew --versionand press enter.
$ brew --version

Homebrew 3.6.20
Select the result that matches your case:
-
If you see "zsh: command not found: brew", click on the menu above.
-
If you see "Homebrew {version}", you have Homebrew installed. You can skip this step.
If you see zsh: command not found: brew, the command brew was not found. There are two possible reasons:
-
You don't have Homebrew installed.
-
You have Homebrew installed, but you need to add it to your
PATH.
Check if one of these folders exist: /opt/homebrew/ or /usr/local/homebrew/. If one of these folders exist, you need to add Homebrew to your PATH. Open the terminal and type:
export PATH=/opt/homebrew/bin:$PATH
Close the terminal and open it again. Type brew --version and press enter. If you see Homebrew {version}, you have Homebrew installed. You can skip this step.
If you are still seeing zsh: command not found: brew, you don't have Homebrew installed, you can install it by following the instructions on the Homebrew website.
Step 2: Check if you have Xcode Command Line Tools installed
What are Xcode Command Line Tools?
"Xcode Command Line Tools are tools for software developers that run on the command line, in the Terminal application. Since before Apple's beginnings, this assortment of Unix-based tools have been the foundation of almost all software development.
Out of the box, a Mac doesn't contain all of the software and tools needed for programming. Instead, Apple provides a complete development environment for programmers named Xcode, which is available separately for download and installation"
from Mac Install Guide
How to check if you have Xcode Command Line Tools installed
- Press ⌘ + Spacebar, type terminal and press enter
- Type
xcode-select --installand press enter.
$ xcode-select --install

---> 100%
If this message appears:
xcode-select: error: command line tools are already installed, use "Software Update" to install updates
You can skip this step. Otherwise, type git --version and press enter.
If your result is similar to the previous video, congratulations! You have successfully installed Xcode Command Line Tools.
Step 3: Install Pyenv
What is Pyenv?
Pyenv is a simple Python version management tool. It lets you easily switch between multiple versions of Python. It's simple, unobtrusive, and follows the UNIX tradition of single-purpose tools that do one thing well.
How do I install Pyenv?
Preferably, you should install Pyenv using Homebrew. But you can also install it from source.
- Press ⌘ + Spacebar, type terminal and press enter
- Type
brew install openssl readline sqlite3 xz zliband press enter.
$ brew install openssl readline sqlite3 xz zlib
- Type
brew updateand press enter.
$ brew update
Type brew install pyenv and press enter.
$ brew install pyenv
Close the terminal and open it again. Type pyenv --version and press enter. If you see pyenv {version}, you have successfully installed Pyenv.
- Press ⌘ + Spacebar, type terminal and press enter
- Type
git clone https://github.com/pyenv/pyenv.git ~/.pyenvand press enter.
$ git clone https://github.com/pyenv/pyenv.git ~/.pyenv
- Type
cd .pyenvand press enter
$ cd .pyenv
- Type
make -s -j2and press enter
$ make -s -j2
- Type
cd srcand press enter
$ cd src
- Type the following multiline code and press enter
CPPFLAGS="-I/opt/local/include" \
LDFLAGS="-L/opt/local/lib" \
./configure --with-pydebug
- Type
cd ..and press enter
$ cd ..
- Type the following multiline code and press enter
echo 'export PYENV_ROOT="$HOME/.pyenv"' >> ~/.zshrc
echo 'export PATH="$PYENV_ROOT/bin:$PATH"' >> ~/.zshrc
echo 'eval "$(pyenv init --path)"' >> ~/.zshrc
- Close the terminal and open it again. Type
pyenv --versionand press enter. If you see an output like this, you have successfully installed Pyenv.
Step 4: Install Python
How do I install Python?
- Type
pyenv install 3.10.9and press enter. This will install Python 3.10.9.
$ pyenv install 3.10.9
- Type
pyenv versionsand press enter. This will show you all the Python versions you have installed with Pyenv.
$ pyenv versions

* system
3.10.9 (set by /Users/kivyschool/.python-version)
- Type
PATH=$(pyenv root)/shims:$PATHand press enter. This will add the path to the shims folder to the PATH variable. This will allow you to use the Python version you installed.
$ PATH=$(pyenv root)/shims:$PATH
- Type
python --versionand press enter. If you seePython 3.10.9, you have successfully installed Python.
$ python --version
- Also, if you type
which pythonand press enter, you should see something like/Users/kivyschool/.pyenv/shims/python. This means that you are using the Python version you installed with Pyenv.
Step 5: Install Poetry
How do I install Poetry?
-
Press ⌘ + Spacebar, type terminal and press enter
-
Type
curl -sSL https://install.python-poetry.org | python3 -and press enter. This will install Poetry.
$ curl -sSL https://install.python-poetry.org | python3 -

---> 100%
- Close the terminal and open it again. Type
poetry --versionand press enter. If you see something likePoetry (version 1.3.2), you have successfully installed Poetry.
Poetry configuration
- Type
poetry config virtualenvs.in-project trueand press enter. This will set the virtual environment to be created in the project folder.
$ poetry config virtualenvs.in-project true
- Type
poetry config virtualenvs.create trueand press enter. This will set the virtual environment to be created automatically when you runpoetry install.
$ poetry config virtualenvs.create true
Step 6: Start a new project with Poetry
How to start a new project with Poetry?
-
Press ⌘ + Spacebar, type terminal and press enter
-
Type
mkdir kivy_schooland press enter. This will create a new folder calledkivy_school.
$ mkdir kivy_school
- Type
cd kivy_schooland press enter. This will change the current directory tokivy_school.
$ cd kivy_school
- Type
poetry initand press enter. This will start the Poetry wizard.
$ poetry init
Just press enter to accept the default values. You can change them later. Once the wizard is finished, you will see a pyproject.toml file in the kivy_school directory. This is the Poetry configuration file, which contains the project dependencies. This means that any library you install using Poetry will be added to this file. This is super useful because you can share this file with other developers and they will be able to install the same dependencies as you have.
Check the Python version used by Poetry
You need to check this only once. Do it now.
- Make sure that Poetry is using the Python version you installed with pyenv. Type
poetry env infoand press enter. You should see something like this:
Virtualenv
Python:         3.10.9
Implementation: CPython
Path:           /Users/kivyschool/kivy_school/.venv
Executable:     /Users/kivyschool/kivy_school/.venv/bin/python
Valid:          True

System
Platform:   darwin
OS:         posix
Python:     3.10.9
Path:       /Users/kivyschool/.pyenv/versions/3.10.9
Executable: /Users/kivyschool/.pyenv/versions/3.10.9/bin/python3.10
Pay attention to the Path and Executable fields used by System. They should point to the Python version you installed with Pyenv. To make sure that poetry is using the correct Python version, you can type poetry env use $(pyenv which python) and press enter.
$ poetry env use $(pyenv which python)
- Activate the virtual environment by typing
poetry shelland pressing enter.
$ poetry shell
- Type
poetry add kivyand press enter. This will install Kivy.
$ poetry add kivy
That's it! You have successfully installed Kivy using Pyenv and Poetry.
Step 7: Run a Kivy "Hello world" example
Create a file called main.py and paste the following code in it.
| main.py | |
|---|---|
1 2 3 4 5 6 7 | |
- On your terminal, type
python main.pyand press enter. This will run the Kivy "Hello world" example.
$ python main.py
Prepare your heart for the magic!
Congratulations! You have successfully installed Kivy using Pyenv and Poetry.
This is the Ubuntu installation guide. If you are using another operating system, please, select it from the menu above.
Step 1: Check if you have Git installed
What is Git?
Git is a distributed version control system that enables multiple developers to collaborate on a project efficiently by tracking changes, managing different versions, and facilitating code integration. It allows developers to create branches for independent development, commit snapshots of their code, and merge changes seamlessly. It stores the entire project history locally on each developer's machine, ensuring data redundancy and offline access. Popular platforms like GitHub, GitLab, and Bitbucket host remote Git repositories, enhancing collaboration with additional tools and services.
How to check if you have Git installed?
-
Open the terminal by pressing Ctrl + Alt + T
-
Type
git --versionand press enter. If you see the Git version, you have Git installed. -
If you don't have Git installed, you can install it by typing
sudo apt-get install gitand pressing enter.
Step 2: Install build dependencies
What are build dependencies?
Build dependencies are the libraries, tools, and other resources required to compile and build a software project. These dependencies ensure that the project can be successfully compiled and run in a development or production environment.
How to install build dependencies?
- Update the package list by typing
sudo apt updateand pressing enter.
$ sudo apt update
- Install the build dependencies
$ sudo apt install build-essential libssl-dev zlib1g-dev libbz2-dev libreadline-dev libsqlite3-dev curl libncursesw5-dev xz-utils tk-dev libxml2-dev libxmlsec1-dev libffi-dev liblzma-dev
Step 3: Install Pyenv
What is Pyenv?
Pyenv is a simple python version management tool. It lets you easily switch between multiple versions of Python. It's simple, unobtrusive, and follows the UNIX tradition of single-purpose tools that do one thing well.
How do I install Pyenv?
-
Open the terminal by pressing Ctrl + Alt + T
-
Type
git clone https://github.com/pyenv/pyenv.git ~/.pyenv
$ git clone https://github.com/pyenv/pyenv.git ~/.pyenv
- Compile Pyenv
$ cd ~/.pyenv && src/configure && make -C src
- Run the following commands on your terminal to add Pyenv to your path
$ echo 'export PYENV_ROOT="$HOME/.pyenv"' >> ~/.bashrc
$ echo 'command -v pyenv >/dev/null || export PATH="$PYENV_ROOT/bin:$PATH"' >> ~/.bashrc
$ echo 'eval "$(pyenv init -)"' >> ~/.bashrc
- Close the terminal and open it again. Type
pyenv --versionand press enter. If you see something likepyenv 2.3.14, you have successfully installed Pyenv.
Step 4: Install Python using Pyenv
How to install Python?
-
Open the terminal by pressing Ctrl + Alt + T
-
Type
pyenv install 3.10.9and press enter. This will install Python 3.10.9.
$ pyenv install 3.10.9
- Type
pyenv versionsand press enter. This will show you all the Python versions you have installed with Pyenv.
$ pyenv versions

* system
3.10.9 (set by /home/kivyschool/.pyenv/version)
- Type
pyenv global 3.10.9and press enter. This will set the global Python version to 3.10.9.
$ pyenv global 3.10.9
- Type
python --versionand press enter. If you seePython 3.10.9, you have successfully set the global Python version to 3.10.9.
$ python --version
Step 5: Install Poetry
What is Poetry?
Poetry is a tool for dependency management and packaging in Python. It allows you to declare the libraries your project depends on and it will manage (install/update) them for you. Poetry offers a lockfile to ensure repeatable installs, and can build your project for distribution.
How to install Poetry?
-
Open the terminal by pressing Ctrl + Alt + T
-
Type
curl -sSL https://install.python-poetry.org | python3 -and press enter. This will install Poetry.
$ curl -sSL https://install.python-poetry.org | python3 -
- Add Poetry to your path by typing
echo 'export PATH="$HOME/.local/bin:$PATH"' >> ~/.bashrcand pressing enter.
$ echo 'export PATH="$HOME/.local/bin:$PATH"' >> ~/.bashrc
- Close the terminal and open it again. Type
poetry --versionand press enter. If you see something likePoetry version 1.4.0, you have successfully installed Poetry.
Poetry configuration
Here we are going to configure Poetry to always create the virtual environment in the project folder for future projects. This will make sure that you don't have to configure it again. Also, we are going to configure Poetry to create the virtual environment automatically when you run poetry install.
- Type
poetry config virtualenvs.in-project trueand press enter. This will set the virtual environment to be created in the project folder.
$ poetry config virtualenvs.in-project true
- Type
poetry config virtualenvs.create trueand press enter. This will set the virtual environment to be created automatically when you runpoetry install.
$ poetry config virtualenvs.create true
Step 6: Start a Kivy project using Poetry
How to create a Kivy project?
Here we are going to create a folder called kivy_school, initialize a Poetry project, and install Kivy. Then we are going to run a Kivy "Hello world" example.
-
Open the terminal by pressing Ctrl + Alt + T
-
Type
mkdir kivy_schooland press enter. This will create a new directory calledkivy_school.
$ mkdir kivy_school
- Type
cd kivy_schooland press enter. This will change the current directory tokivy_school.
$ cd kivy_school
- Type
poetry initand press enter. This will start the Poetry wizard.
$ poetry init
Always press enter to accept the default values, except on "Compatible Python versions" part. It will ask you things like:
- Package name, Version, Description, Author, License (accept default values by just pressing enter)
Compatible Python versions: type 3.11.7 and press enter- Would you like to define your main dependencies interactively? Just press enter twice.
- Would you like to define your development dependencies interactively? Just press enter twice.
- Do you confirm generation? (yes/no) [yes]
Do not worry if you make anything wrong during the wizard, you can change them later.
Once the wizard is finished, you will see a pyproject.toml file in the kivy_school directory. This is the Poetry configuration file, which contains the project dependencies. This means that any python library you install using Poetry will be added to this file. This is super useful because you can share this file with other developers and they will be able to install the same dependencies as you have.
Check the Python version used by Poetry
You need to check this only once. Do it now.
- Make sure that poetry is using the python version you installed with pyenv. Type
poetry env infoand press enter. You should see something like this:
Virtualenv
Python:         3.10.9
Implementation: CPython
Path:           NA
Executable:     NA

System
Platform:   linux
OS:         posix
Python:     3.10.9
Path:       /home/kivyschool/.pyenv/versions/3.10.9
Executable: /home/kivyschool/.pyenv/versions/3.10.9/bin/python3.10
Pay attention to the Path and Executable fields used by Virtualenv. They should point to the Python version you installed with Pyenv. To make sure that poetry is using the correct Python version, you can type poetry env use $(pyenv which python) and press enter.
$ poetry env use $(pyenv which python)
- Activate the virtual environment by typing
poetry shelland pressing enter.
$ poetry shell
- Type
poetry add kivyand press enter. This will install Kivy.
$ poetry add kivy
That's it! You have successfully installed Kivy using Pyenv and Poetry.
Step 7: Run a Kivy "Hello world" example
Create a file called main.py and paste the following code in it.
| main.py | |
|---|---|
1 2 3 4 5 6 7 | |
- On your terminal, type
python main.pyand press enter. This will run the Kivy "Hello world" example.
$ python main.py
Prepare your heart for the magic!
Congratulations! You have successfully installed Kivy using Pyenv and Poetry.
This is the Windows installation guide. If you are using another operating system, please, select it from the menu above.
What is the plan?
The plan is to install Git, Pyenv and Poetry on Windows. Then we are going to create a Kivy project and run a Kivy "Hello world" example.
Step 1: Install Git
What is Git?
Git is a version control system. You use git so you can manage several projects at once. As you can imagine, different projects require different tools and dependencies. Git is one way to control your projects so that you don't have to struggle remembering what package goes where a few weeks after you actually installed your package. It is also used with online repositories like Github and Gitlab.
How do I install Git?
- Git download link
- Download Git for Windows and follow the installer. The default settings should be fine. You can change the initial branch name to anything you like (or easier/faster to type) like
mainordevinstead of the long default ofmaster. We recommend usingmainas the default branch name.
Why should I change the default branch name?
If you stick to the default, you will have to type master very often. A common command will be git checkout master or git merge origin master, which will be shortened to: git checkout main if using main.
Step 2: Install Pyenv
What is Pyenv?
Pyenv is a version management tool for Python. This is important because you do not want to install several versions of Python in your default system's PATH. Instead, you want to use Pyenv and the command poetry env use to manage different versions of Python for your projects.
How do I install Pyenv?
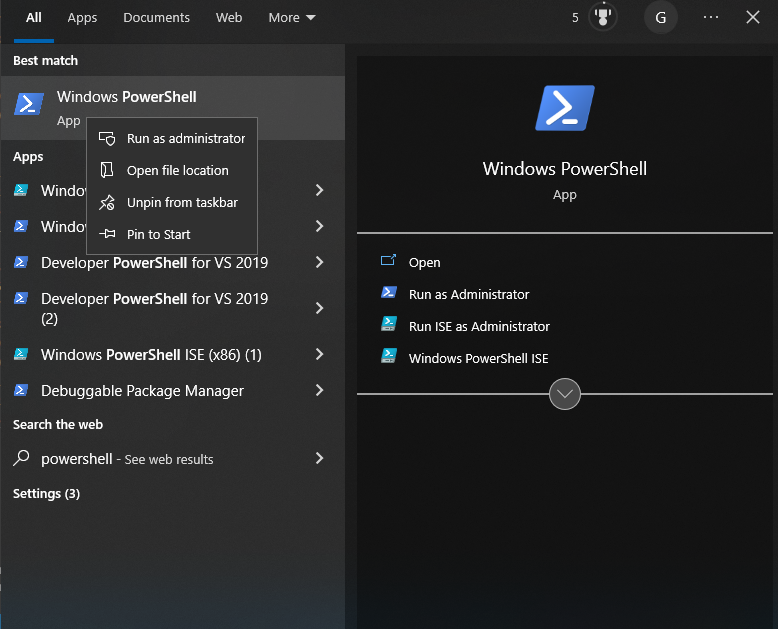
How to open a Powershell terminal as admin?
- You can hit the ⊞ Windows key and type Powershell
- Then either right click on the Powershell icon and click on "run as administrator" or the "run as administrator" button on the right side of the start screen
Run Powershell as administrator and execute the following before installing pyenv-win:
£C:\Users\KivySchool Set-ExecutionPolicy -ExecutionPolicy RemoteSigned -Scope LocalMachine
Type Y for "yes".
In Powershell, install pyenv-win by executing the following:
£C:\Users\KivySchool Invoke-WebRequest -UseBasicParsing -Uri "https://raw.githubusercontent.com/pyenv-win/pyenv-win/master/pyenv-win/install-pyenv-win.ps1" -OutFile "./install-pyenv-win.ps1"; &"./install-pyenv-win.ps1"
If the install fails, try doing the install command again before Googling your error.
-
Reference for git installation of pyenv:
-
Open Command Prompt
How to open Command Prompt?
- ⊞ Windows key
- Type "cmd" without quotes
- Press Enter
- In Command Prompt, type:
£C:\Users\KivySchool git clone https://github.com/pyenv-win/pyenv-win.git "%USERPROFILE%\.pyenv"
What does it mean to add to PATH?
Adding a program to PATH means that your system by default can activate it from the terminal. If you don't have pyenv in your PATH you will get:
'pyenv' is not recognized as an internal or external command, operable program or batch file.
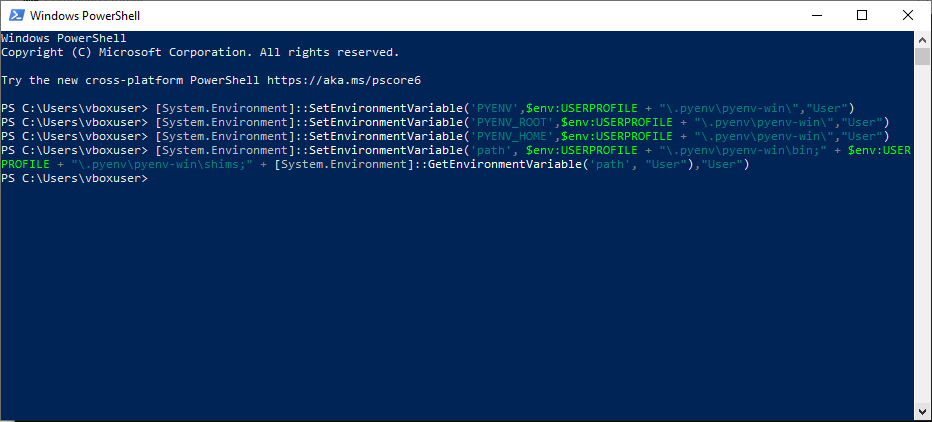
- Now add pyenv to PATH:
- Open a new Powershell instance
-
Copy paste the commands, one at a time:
£C:\Users\KivySchool [System.Environment]::SetEnvironmentVariable('PYENV',$env:USERPROFILE + "\.pyenv\pyenv-win\","User")£C:\Users\KivySchool [System.Environment]::SetEnvironmentVariable('PYENV_ROOT',$env:USERPROFILE + "\.pyenv\pyenv-win\","User")£C:\Users\KivySchool [System.Environment]::SetEnvironmentVariable('PYENV_HOME',$env:USERPROFILE + "\.pyenv\pyenv-win\","User")£C:\Users\KivySchool [System.Environment]::SetEnvironmentVariable('path', $env:USERPROFILE + "\.pyenv\pyenv-win\bin;" + $env:USERPROFILE + "\.pyenv\pyenv-win\shims;" + [System.Environment]::GetEnvironmentVariable('path', "User"),"User")
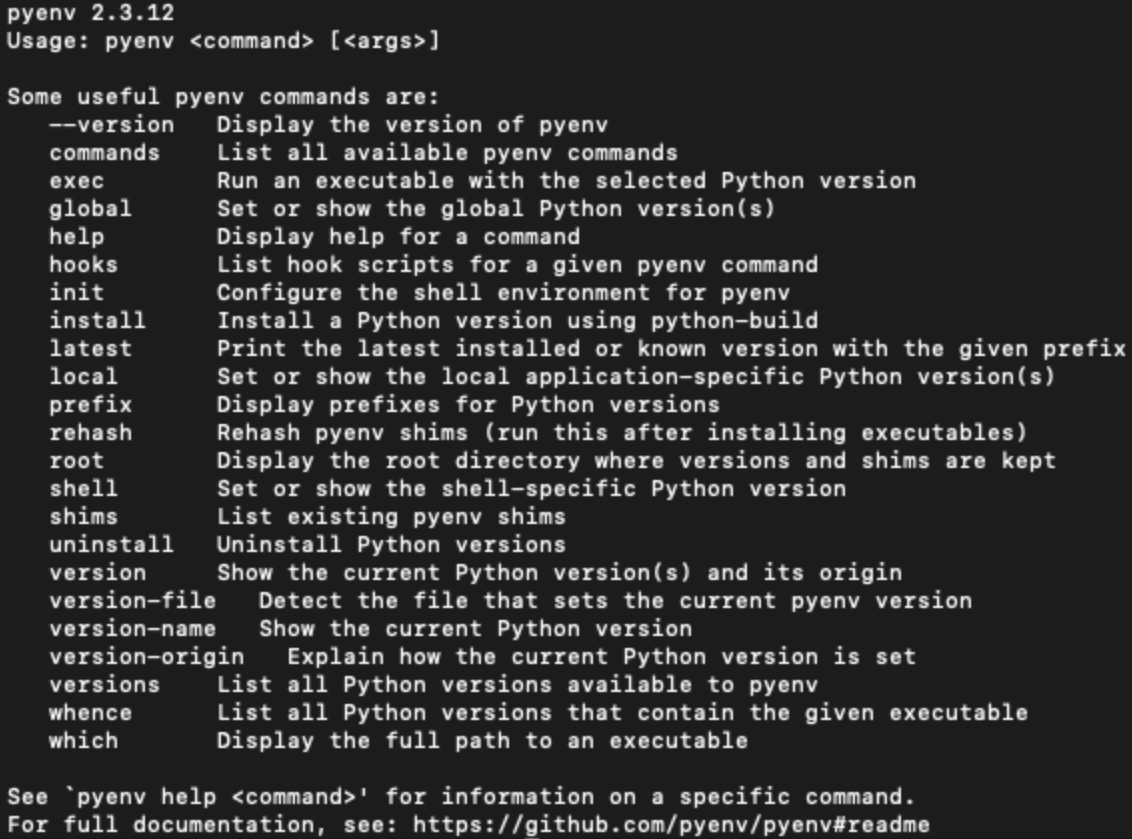
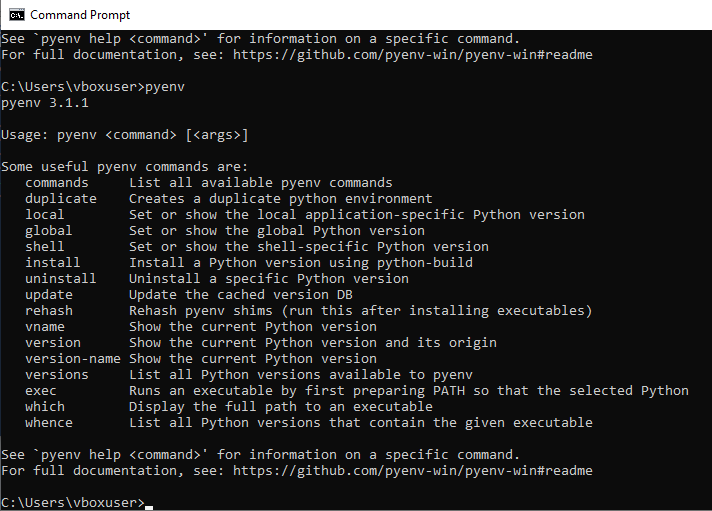
Check if pyenv is installed
- Open a new command prompt terminal and type:
pyenv - The response should be your pyenv version and options for commands
If there's no errors, proceed to the next step.
Step 3: Install Python using Pyenv
How do I install Python?
- Open a new command prompt terminal and type
pyenv install 3.10.9and press enter. This will install Python 3.10.9.
£C:\Users\KivySchool\ pyenv install 3.10.9
- Type
pyenv versionsand press enter. This will show you all the Python versions you have installed with Pyenv.
£C:\Users\KivySchool\ pyenv versions

* system
3.10.9 (set by C:\Users\kivyschool\.pyenv\pyenv-win\version)
- Type
pyenv global 3.10.9and press enter. This will set the global Python version to 3.10.9.
£C:\Users\KivySchool\ pyenv global 3.10.9
- Type
python --versionand press enter. If you seePython 3.10.9, you have successfully set the global Python version to 3.10.9.
£C:\Users\KivySchool\ python --version
Python 3.10.9
Step 4: Install Poetry
What is Poetry?
Poetry is a tool for dependency management and packaging in Python. It allows you to declare the libraries your project depends on and it will manage (install/update) them for you. Poetry offers a lockfile to ensure repeatable installs, and can build your project for distribution. This is necessary for packaging to Android as buildozer installation and dependency install will be handled for you by Poetry.
How do I install Poetry?
Installing Poetry on your Windows machine using Powershell and Pyenv
- Official Poetry installation link.
- Open a new Powershell terminal and check that Python is available:
£C:\Users\KivySchool\ python
- You can type
exit()to leave the Python interpreter in Powershell.
Python is not installed!
- If Python is not installed, you can use Pyenv to install and set a Python version with these commands. The Pyenv installation instructions are above.
£C:\Users\KivySchool\ pyenv install 3.10.9
£C:\Users\KivySchool\ pyenv global 3.10.9
- If you don't have Python 3.10.9 available for your machine, you can use
£C:\Users\KivySchool\ pyenv install -l -o
to find a Python version available for your machine and use
£C:\Users\KivySchool\ pyenv global (your installed version)
Example
- If you installed Python 3.10.7 with
pyenv install 3.10.7, you would type this to set your global Python version to 3.10.7:
pyenv global 3.10.7
-
If you needed to install Python, open a new Powershell terminal so that it has Python available. If your Powershell terminal already had Python installed, you can use it for the next section.
-
Then, type in Powershell:
£C:\Users\KivySchool\ (Invoke-WebRequest -Uri https://install.python-poetry.org -UseBasicParsing).Content | python -
- Now add Poetry to your system's PATH:
What does it mean to add to PATH? Command Prompt cannot find Poetry after installation!
Adding a program to path means that your system can activate it by default from the terminal. If you don't have poetry in your PATH you will get:
'poetry' is not recognized as an internal or external command, operable program or batch file.
To manually add a file to your PATH:
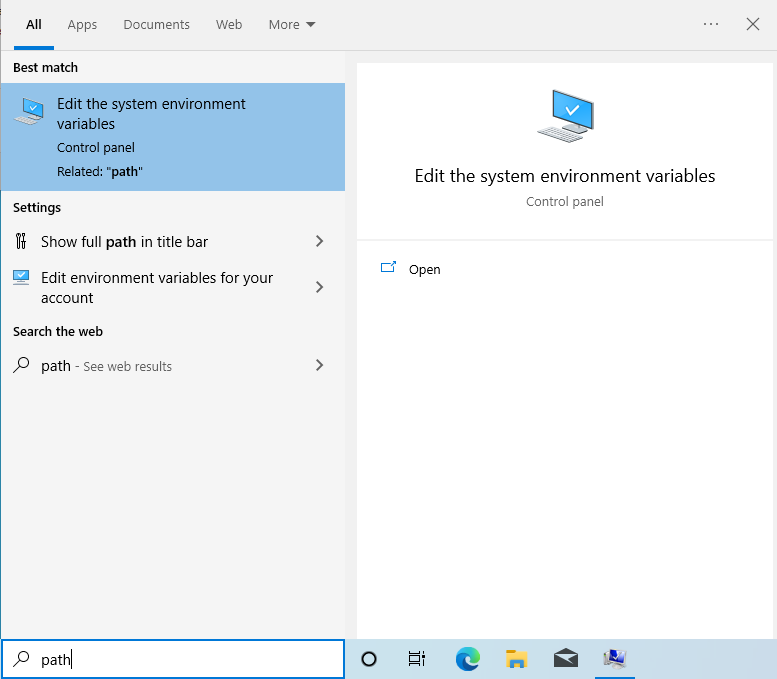
- Press ⊞ Windows key
- Type "PATH"
- Click "Edit the system control variables"
- Make sure you are in the "Advanced" tab
- Click "Environment Variables"
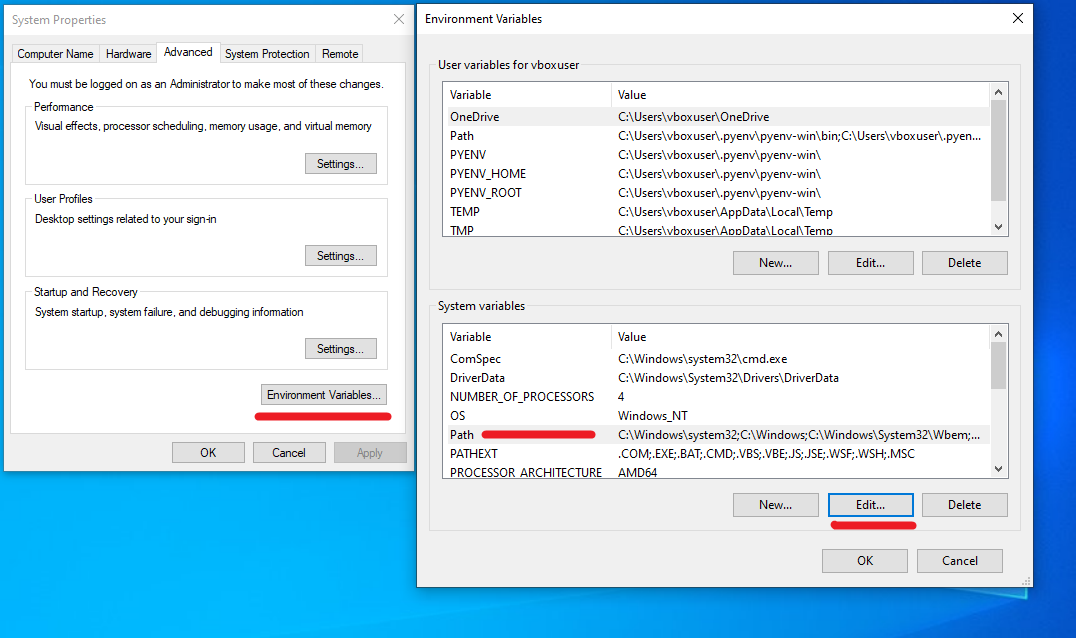
- Under system variables, click Path, then "Edit". (You might get PATH problems if you are a user that is not an admin and use the user variables.)
- Click "New" line, then add the folder that Poetry is installed in as a new line:
- Poetry by default is installed in:
%APPDATA%\Python\Scripts(which can resolve to...\APPDATA\Roaming\Python\Scripts)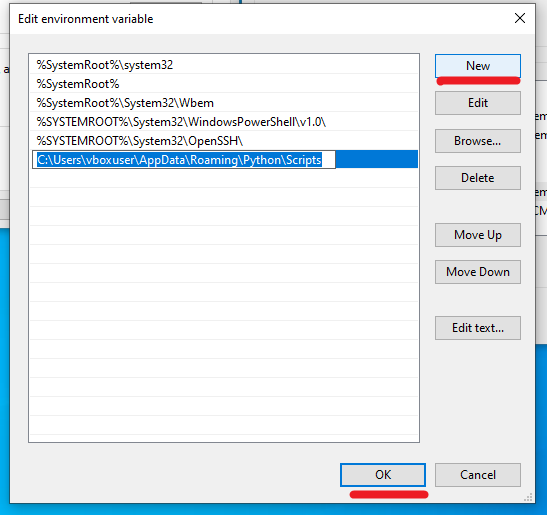
- To confirm that Poetry is installed (or you suspect it did not complete install), you can press ⊞ Windows key > type "File Explorer" and copy paste
%APPDATA%\Python\Scriptsin the address bar. - There should be a "poetry.exe" in this folder.
- To check if you have added Poetry to PATH, make a new command prompt (press ⊞ Windows key > cmd)
- Type in cmd:
£C:\Users\KivySchool\ poetry --version
Check if Poetry is installed
- Hit ⊞ Windows key and type:
cmd - Type
poetry -v,poetry -version, or simplypoetry. - If you see no errors, Poetry is installed.
Poetry configuration
Why set the virtual environment in the project?
At some point, you will end up reading a lot source code. It's easier to have the environment in an accessible place per project so you can have quick access to your dependencies. Having your virtual environment in the same folder as your project makes it easier to find the right dependency to read. Just remember to exclude the environment folder in your .gitignore file so git doesn't upload your entire environment online.
Here we are going to configure Poetry to always create the virtual environment in the project folder for future projects. This will make sure that you don't have to configure it again. Also, we are going to configure Poetry to create the virtual environment automatically when you run poetry install.
- Type
poetry config virtualenvs.in-project trueand press enter. This will set the virtual environment to be created in the project folder.
£C:\Users\KivySchool\ poetry config virtualenvs.in-project true
- Type
poetry config virtualenvs.create trueand press enter. This will set the virtual environment to be created automatically when you runpoetry install.
£C:\Users\KivySchool\ poetry config virtualenvs.create true
- There will be no success message, but you will know it works when Poetry makes a
.venvfolder in your first project. There, you can see the Python version, and all the libraries associated with that project in the "Lib" folder.
Step 5a: Install Visual Studio Code (Optional)
What is VS Code?
VS Code is a text editor that is easy to use and also gives easy access to Command Prompt and Powershell with
CTRL + J
- Download and install VS Code from: https://code.visualstudio.com/
- The defaults are good enough to use, so follow through the installer.
Step 5b: Install Kivy using Poetry
Now it's time to make your own "Hello world!" app!
Quick Hello world! Kivy app from scratch
You will create a simple Kivy "Hello world!" app. We will be using VS Code to demonstrate.
- Make a new folder with the name "HelloWorld"
How do I make a new folder in Windows?
- Open File Explorer ( ⊞ Windows key > type "file explorer")
- You can right click on an empty space in the folder of your choice and click "New > Folder"
- In VS Code, use the default shortcut to bring up a new terminal
£C:\Users\KivySchool\ CTRL + J
- Check if the terminal is in the folder you want to create your subfolder
- If you need to change directory, the command is
cd <folder location> - In your VS Code terminal, type
£C:\Users\KivySchool\ mkdir "KivyProjects"
- You can also press ⊞ Windows key, type
cmdand entercd "Your folder location"to a folder of your choice - In your terminal, type
£C:\Users\KivySchool\ mkdir "KivyProjects"
-
Open VS Code (⊞ Windows key > type
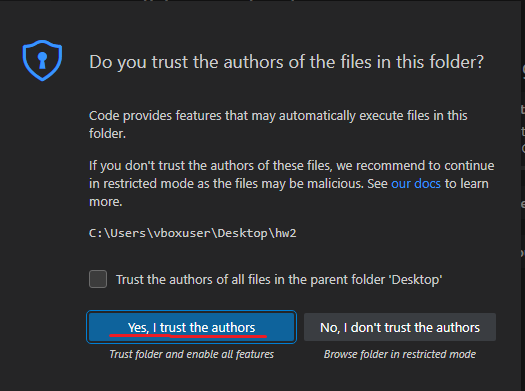
VS Code> press Enter), and open the HelloWorld folder (File > Open Folder > HelloWorld). You can use the shortcutCTRL + Kfollowed byCTRL + Oto see theOpen Folderdialogue option in VS Code. -
If VS Code asks you to "trust the authors", click Yes.
-
Select VS Code and open the terminal with
CTRL +J. -
Type in VS Code terminal:
£C:\Users\KivySchool\HelloWorld poetry init
What does Poetry ask me?
- These are the options Poetry will ask you to define, the only one that matters now is the Python version. If you are asked for author, put whatever you want. Keep pressing Enter until
Compatible Python versionsappears. For that line, type3.10.9.
Package name:
Version:
Description:
Author:
License:
Compatible Python versions:
These options matter if you want to upload a package to PyPI, or to share with other users. Remember to choose Python 3.10.9!
- Just keep pressing enter to accept the default values. If you are asked for author, put whatever you want. You can change them later.
- For
Compatible Python Versions, type3.10.9. Remember to choose Python 3.10.9! - Once the wizard is finished, you will see a
pyproject.tomlfile in theHelloWorlddirectory. This is the Poetry configuration file, which contains the project dependencies. This means that any library you install using Poetry will be added to this file. This is super useful because you can share this file with other developers and they will be able to install the same dependencies as you have.
Now we are going to force Poetry to use Python 3.10.9 from Pyenv. First, find the path to Python 3.10.9:
If you haven't installed Python 3.10.9 with Pyenv
- To install:
£C:\Users\KivySchool\HelloWorld pyenv install 3.10.9
- If that version is not available to you, you can use
pyenv install -l -oand pick a recent Python version.
- To find the location of Python 3.10.9, type in your VS Code terminal:
£C:\Users\KivySchool\HelloWorld pyenv shell 3.10.9
£C:\Users\KivySchool\HelloWorld pyenv which python
- Copy the file location for the next step.
- Next, type:
£C:\Users\KivySchool\HelloWorld poetry env use "location of python 3.10.9 from the previous step"
Example
- For example:
£C:\Users\KivySchool\HelloWorld poetry env use "C:\Users\KivySchool\.pyenv\pyenv-win\versions\3.10.9\python.exe"
Too many arguments!
If your filepath has spaces, you must use quotes to surround your filepath so that you do not get an error, else you will see:
£C:\Users\KivySchool\HelloWorld Too many arguments to "env use" command, expected arguments "python"
In the example above, the filepath is already surrounded by quotes.
- Once the terminal is done, VS Code may ask in the bottom right (if the option has not been set already):
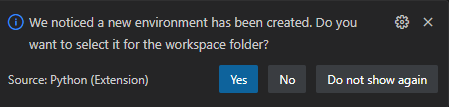
- Click yes. This allows VS Code to run your Python files with the right version of Python and running a Python file with the
F5key. You can always run any Python file from within apoetry shellinstance of the terminal usingpython filelocation.py
The specified Python version is not supported by the project.
This means that your pyproject.toml file has a different version requirement than 3.10.9. To fix this, open pyproject.toml and change the line python = under [tool.poetry.dependencies] to python = "3.10.9". Then run poetry env use again. Remember to save the pyproject.toml file!
- Then you will see:
£C:\Users\KivySchool\HelloWorld Creating virtualenv helloworld in C:\Users\KivySchool\Desktop\HelloWorld\.venv
Using virtualenv: C:\Users\KivySchool\Desktop\HelloWorld\.venv
- Now, we use Poetry to add Kivy to our Python 3.10.9 virtual environment in the "HelloWorld" folder:
£C:\Users\KivySchool\HelloWorld poetry add kivy
-
This installs Kivy to your virtual environment.
-
Afterwards, type this to update and install everything to the virtual environment. You might get
No dependencies to install or update. That is ok.
£C:\Users\KivySchool\HelloWorld poetry install
Dependency did not install!
Sometimes your dependencies don't install completely. If that is the case, poetry install again. In the worst case, Google is your friend.
- Now that the virtual environment is set up, we can enter it using
£C:\Users\KivySchool\HelloWorld poetry shell
What is a virtual environment?
A virtual environment is used to separate your work on a project from your base operating system. This is so that different Python versions don't conflict, and make it harder for version conflicts to happen. The worst case scenario is that you install everything in your base Windows system. This is a problem because one project might need a dependency like OpenCV and Python 3.7 to work, but in another project a dependency wants Python 3.10. You will get a lot of headaches trying to sort out versions. Instead, separate them in virtual environments away from your operating system to save yourself the trouble.
With Poetry, you type poetry shell in your project's folder so that you interact with Python and the dependencies listed for that project only, NOT the version of Python that is installed in your base OS.
- Now that you typed poetry shell, you will see your project on the left side of the terminal:
(helloworld-py3.10)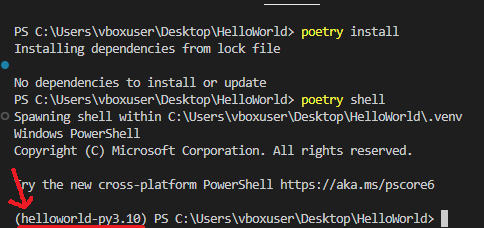
- That means that you're inside your virtual environment, and can access all the dependencies for the project
HelloWorld
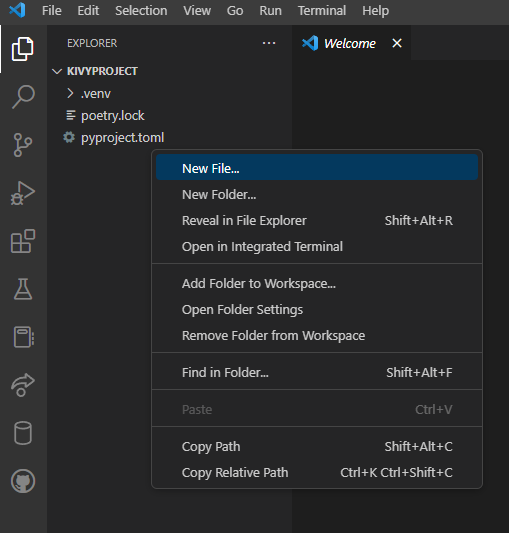
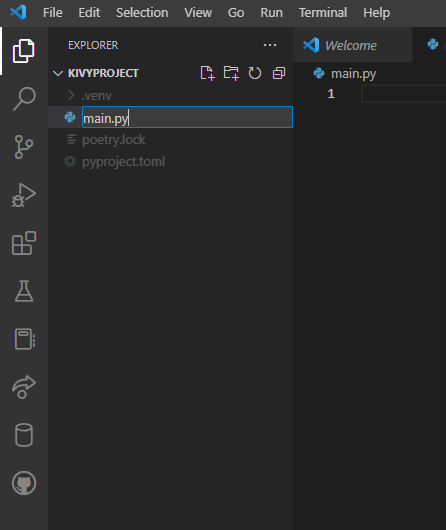
How to make a new file in VS Code
-
Now make a
main.pyfile with these lines. In the left hand side of VS Code, you can right click under the project directoryHelloWorldand there will be an option to make a new file. -
main.py:
from kivy.app import runTouchApp
from kivy.lang import Builder
kvString = '''
Button:
    text: "Hello world!"
'''
runTouchApp(Builder.load_string(kvString))
- Remember to save your file before running!
VS Code Setup
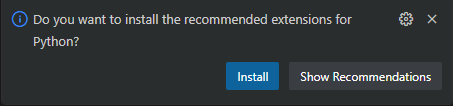
- For VS Code, you need to install the Python extensions to debug with
F5. You should click "Install" for this then you can run selected Python files by pressingF5in VS Code.
- If you skipped the above dialogue option, you can press
F5while yourmain.pyfile is selected. You will be greeted with this dialogue:
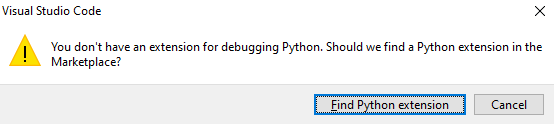
-
Press "Find Python extension"
-
Download this extension, and at the time of writing it has 79M downloads:

- Wait for the install to finish then you can debug Python files with the
F5shortcut while your file is selected in VS Code.
- To run the app, you can type in your poetry shell terminal
£C:\Users\KivySchool\HelloWorld python main.py
-
Or, you can click on
main.pyin VS Code and pressF5. -
If VS Code shows this, click to "Debug the currently active Python file"
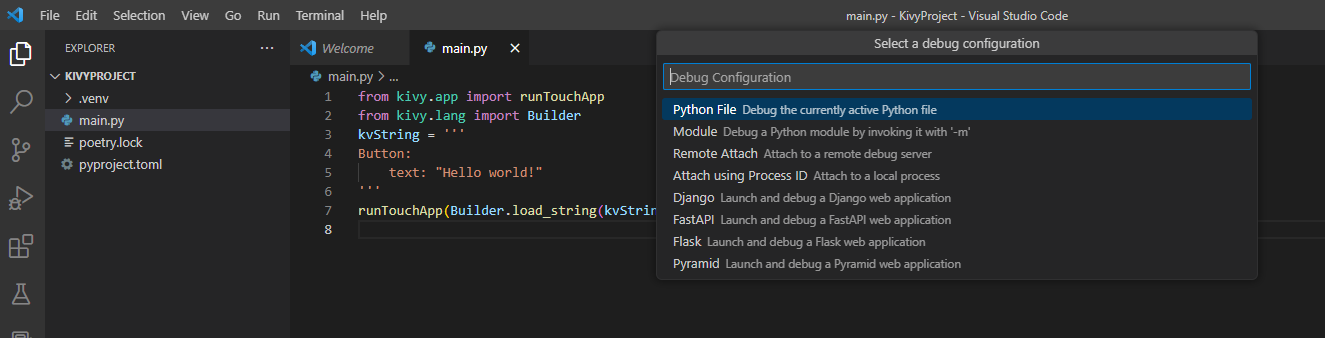
- Hello world!
-
If you're using Git to upload to Github, now is the time to add
.venvandpoetry.lockto the.gitignorefile. You'll thank yourself later. -
Add these lines to
.gitignoreif you are using git:
.venv
poetry.lock
Linux installation guide
Linux installation guide
Are you ready to learn more about Kivy? Let's go!